On this page I list how I set up Home Assistant on a Raspberry Pi 3B+ with zigbee stick ZigStar V4 and 5 zigbee temperature sensors from Aqara.
Last updated: in november 2022 and this page applies to Home Assistant release 2022.11.0 and maybe later releases.
The first attempt was using Raspberry Os with Zigbee2Mqtt (abbr. Z2M, requires also Mosquitto, Node.js, Node-Red, etc) but the installation process of Zigbee2Mqtt was so frustrating SLOW that I switched to Home Assistant. In Home Assistant (abbr. HA) I used the ZigBee Home Automation (abbr. ZHA) add-on. ZigsStar is compatible with ZHA. You could go for the Mosquitto broker + Zigbee2Mqtt add-ons but ZHA does not need any configurating.
The HA documentation is not up-to-date and the HA interface can change per release, thus often you have to figure it out self how to do things. I tried to document what I did.... and there will be more ways to get the same result. No guarantee this page is up to date !!
Home Assistant is controlled via a browser on a PC or laptop and not via to the PI connected display/keyboard.
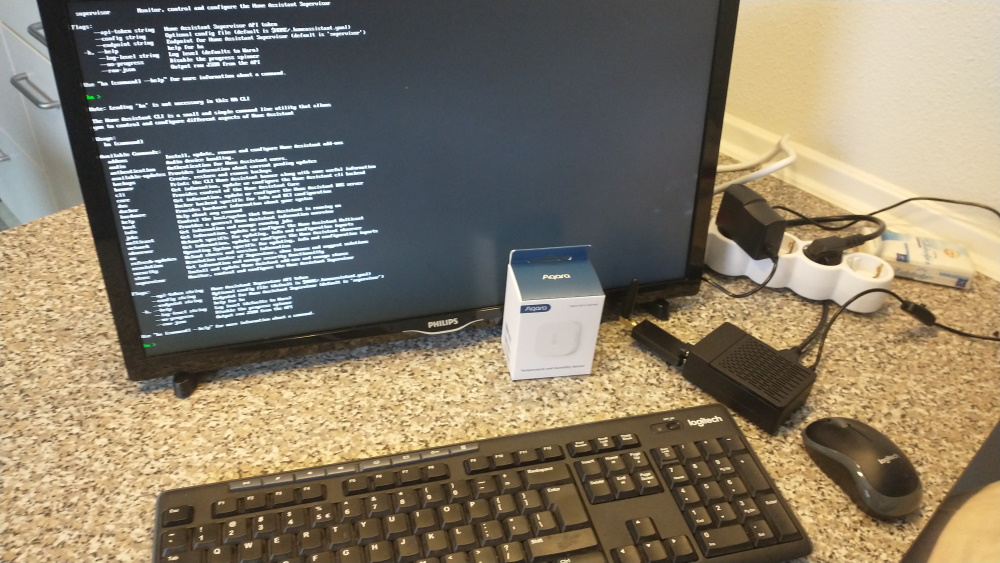
- a Raspberry Pi 3B+, if you can get it use the faster 4 instead of the 3.
Use a PI power supply that delivers at least 2.5 amperes at [5.1 | 5.2] Volts or you may get an under Voltage detection. A normal USB power adapter is NOT sufficiant. The PI case is from AlieX: 52Pi Abs Case Kit with Heatsinks + ventilator for Raspberry Pi 3 B + / 3 / 2 Model B. - a ZigStar V4 usb stick (compatible with Z2M and ZHA) https://zig-star.com/projects/zigbee-stick-v4/ but bought on www.marktplaats.nl .
- 5 Aqara temperature and humidity sensors (measures also pressure) Wsdcgq11lm from home2link.nl . Placed in and around my house.
Hardware:
- ZigBee Home Automation (ZHA)
Required for communication with the ZigStar stick. - Terminal & SSH
- Allows a terminal session within the PC's HA web-browser page (limited linux commands);
- Enables (not sure..?) the Home Assistant "ha" interface with a display/keyboard connected to the PI
- Allows secure remote login via a PC's terminal or powershell
Home Assistant add-ons used:
- Install HA on Raspberry Pi
This page https://www.home-assistant.io/installation/raspberrypi/ describes the installation for the Raspberry Pi. Follow the instructions then continue with "ONBOARDING" when you reach that instruction. Ignore all instructions starting from "Install Home Assistant Container". - Install 2 add ons: ZigBee Home Automation, Terminal & SSH
When You are logged in to HA via a browser. use this page https://www.home-assistant.io/addons/ to install add-ons. If no add-ons are displayed then click on "ADD-ON STORE" on the right bottom corner.
The ZigBee Home Automation (ZHA) turns up under "Settings -> Devices & Services".
The Terminal is available in the left side menu.
- How to REBOOT ?
- You are logged in to HA via a browser.
- Left bottom corner, click on "Developer Tools"
- Upper side menu, click on YAML and then on RESTART (on the right side)
- Drink a cup of tea/coffie/milk, relax and enjoy the weather outside. Rebooting takes time...
- How to REBOOT or SHUTDOWN ?
- You are logged in to HA via a browser.
- Left bottom corner, click on "Settings" then "System" and then "Hardware"
- Click on the menu 'three dots' ︙ in the upper right corner and the menu displays both options !!!
- Rebooting: Drink a cup of tea/coffie/milk, relax and enjoy the weather outside. This takes time...
- How to SHUTDOWN ?
- Display + keyboard connected to PI
- Type "host ?" which shows the options for command 'host'.
- Type "host shutdown"
- Install ZigStar stick
- You are logged in to HA via a browser.
- Plug the ZigStar V4 usb stick into the Raspberry Pi.
- Left bottom corner, click on "Settings" and then on "Devices & services".
- Right bottom corner click "+ ADD INTEGRATION"
- From the list click "Add Zigbee device", or type Zigbee in the search field, which starts a search for the device.
The search can be stopped by pushing the back arrow in the upper left side.
- When the Zigbee device is found....
- Pairing (temperature) sensors
- The sensor is ready to use (has a battery). The sensor has a 'pairing' button to start pairing with a Zigbee coordinator.
- You are logged in to HA via a browser.
- Left bottom corner, click on "Settings" and then on "Devices & services".
- Click on Zigbee Home Automation "1 device" (assuming only 1 ZigStar is added). A list of devices is displayed where the Zigbee coordinator is the ZigStar stick.
- Right bottom corner, click "+ ADD DEVICE". The search for a not-paired sensor is started.
The search can be stopped by pushing the back arrow in the upper left side.
- Push the pairing button of the sensor and keep it pushed for 6 seconds (until some leds of the sensor blink)
- The sensor is found...
- ... ToDo how to add the sensor to Overview - 24 hour time and language
- You are logged in to HA via a browser.
- Left bottom corner, click on your username which opens the Profile
- In the Profile select language, number format and time format
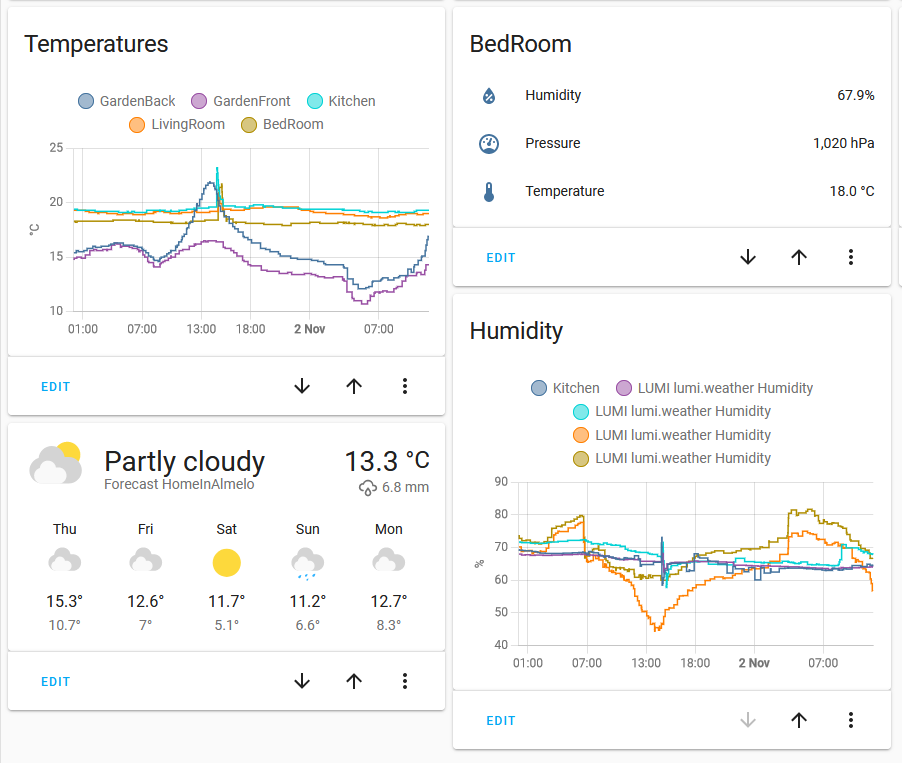
- Optional: reboot when the change is not visible after a page refresh - Naming sensors in a graph
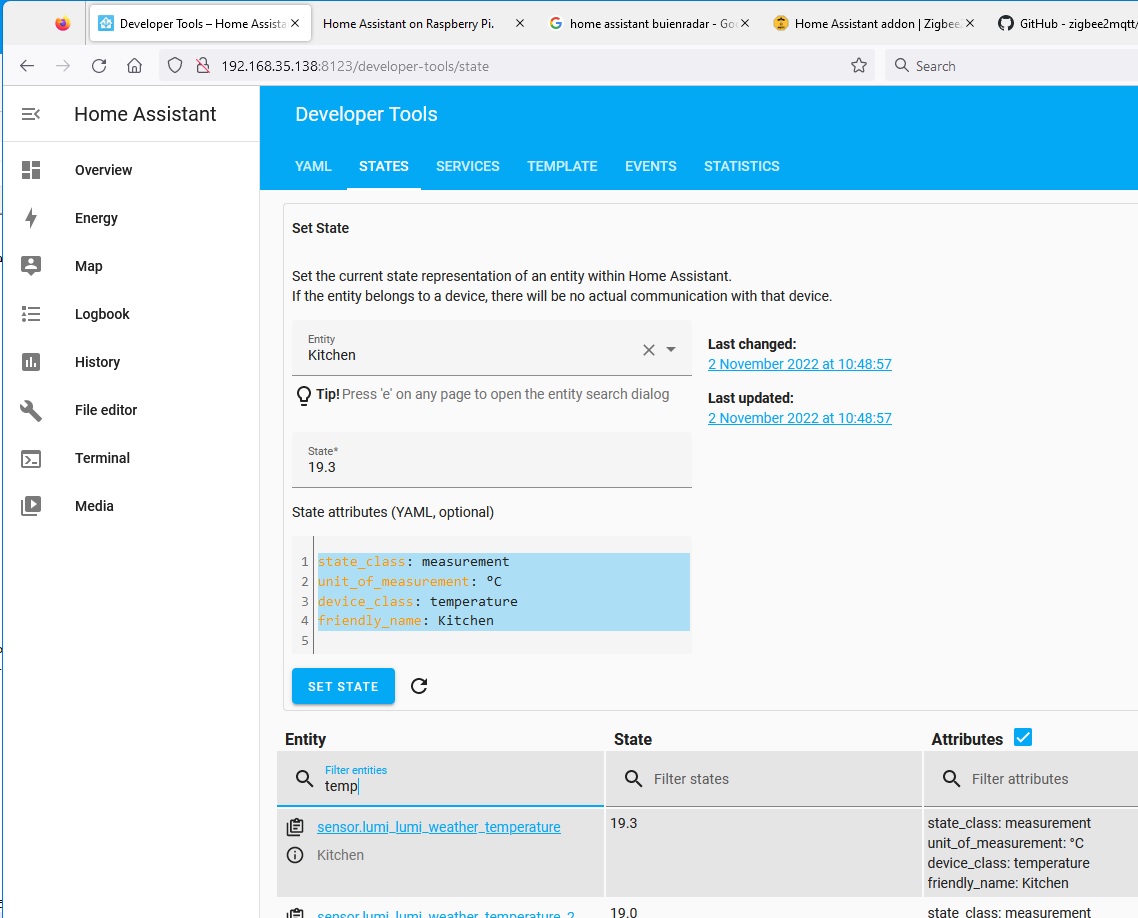
- You are logged in to HA via a browser.
- Some sensors turned up in the graph as "LUMI lumi.weather Temperature"
- Add a friendly name via "Developer Tools" then "States", select an entity and change it to "friendly_name: my_friend" in the "State attributes (YAML, optional)" box (is editable) then push "SET STATE" or
- Click "Settings" then "Devices & Services" then "Zigbee Home Automatien, 35 entities" (35 or other number). Double click on the entity, enter a "Name" then push "UPDATE" - Click "Overview" (dashboard) and then refresh the browser (forces a new login) - Editing the "Overview"
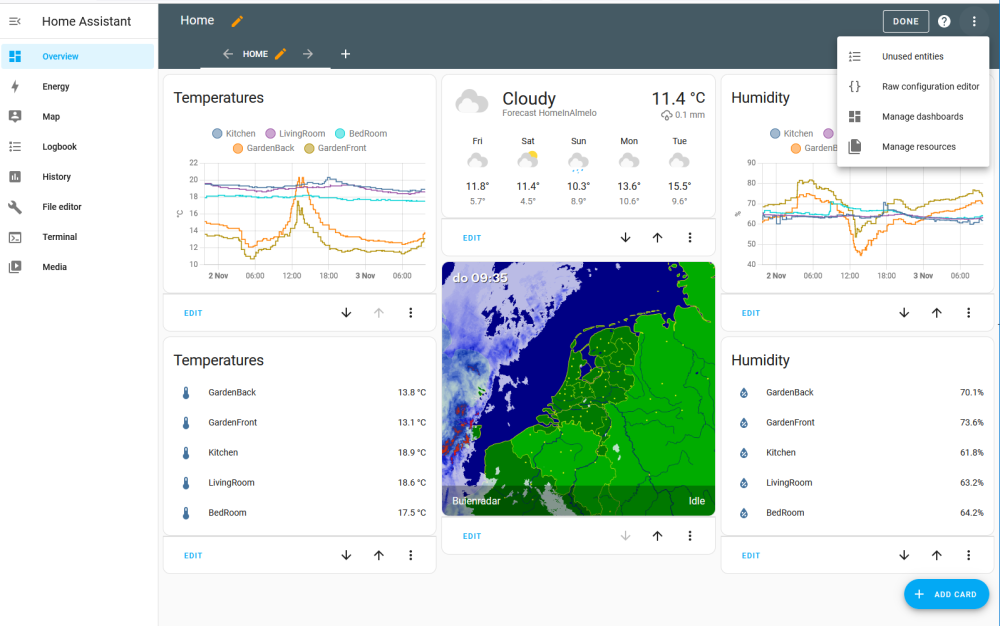
- You are logged in to HA via a browser.
- Click on the menu 'three dots' ︙ in the upper right corner and select "Edit Dashboard".
- Larger card
- You are logged in to HA via a browser.
- ... via "Edit Dashboard" one can click on "Edit View" (move mouse over pencils) and select "View type" 'Panel' but its not what I want.
- Wifi
- You are logged in to HA via a browser.
- Select "Settings -> System -> Network"
- Click WLAN0 under Configure network interfaces
- Click IPv4 and select DHCP
- Click Wi-Fi and then "SCAN FOR ACCESS POINTS"
- Select from the listed access points the desired point
- Scroll down and select the protocol [open|web|wpa-psk] and enter the required Password.
- Remove ethernet cable and reboot ( YOUR router probably uses another IP-address for Wifi !! )
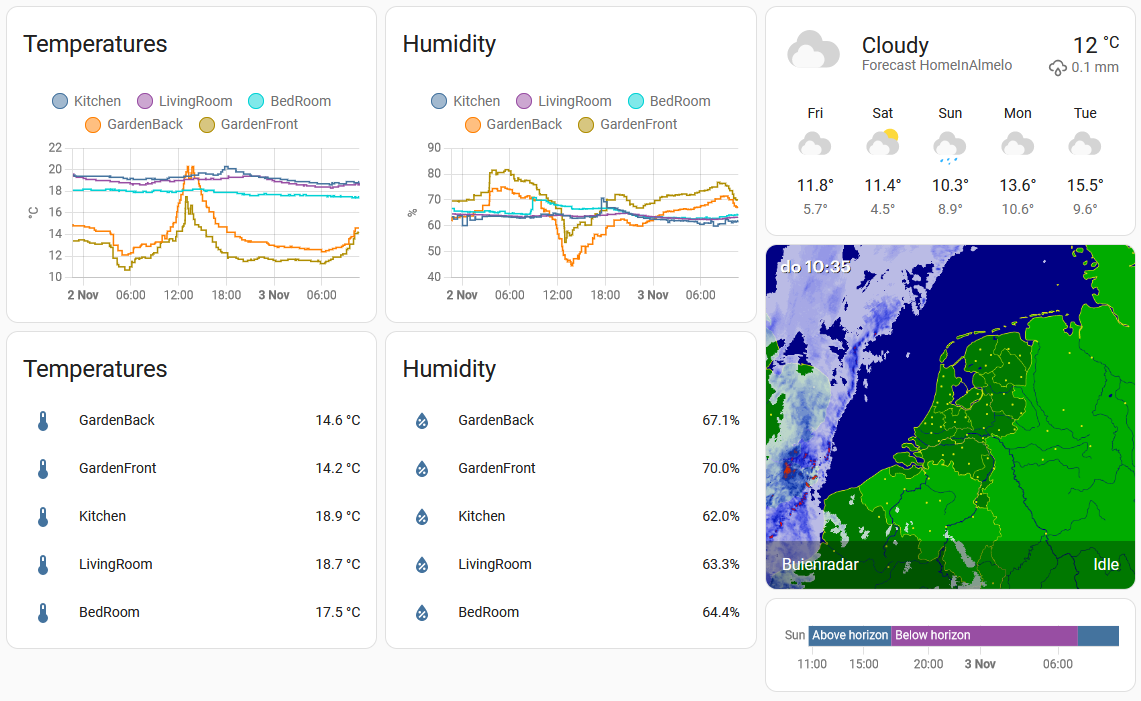
- Rain prediction
- You are logged in to HA via a browser.
- Follow the instructions on this page https://www.home-assistant.io/integrations/buienradar/
- Click lower right corner "+ ADD CARD"
- In the pop-up window select "BY ENTITY"
- - Search then select (checkbox) "Buienradar camera.buienradar"
- - In the lower right corner push "CONTINUE" and then "ADD TO DASHBOARD"
- More later...
Steps: